|
|
I
like to secure the headband with anchor stitches that
go through section centres as they lay nice and flat and
are less obtrusive. As it can be almost impossible to
find the centres of sections when the book is firmly held
in a press however, I mark them in advance.
I
have a marker in the centre of the first section after
the endpapers and the centre of a section an eighth to
a tenth of an inch further into the book. I've done the
same thing at the other end of the book. The markers in
between are at quarter to half inch intervals. (The number
and distance will vary depending upon the width of the
book.)
|
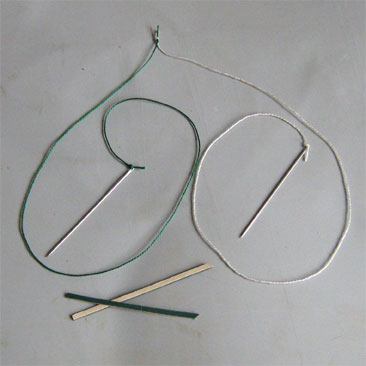
| Measure
off 2 lengths of contrasting thread. Thread 2 bookbinding
needles, knotting the thread close to the eye of the needle.
Make a knot joining the 2 free ends of thread together.
Cut 2 strips of leather stiffened with manilla. They should
be about a tenth of an inch deep and an inch or so longer
than the width of the spine. |
|
|
|
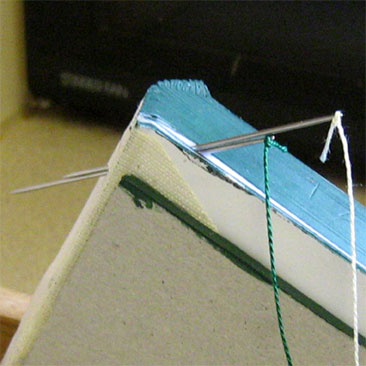
Put
one needle through the centre of the first marked section,
making sure it emerges below the first stitching line. Push
the second needle over the first, so that it emerges at
the same place. Pull both needles completely through the
section and feed the thread gently through until the knot
rests against the inside of the section. (If the needles
are fed through separately, it's all too easy for the second
needle to go through the thread on the first needle!) |
|
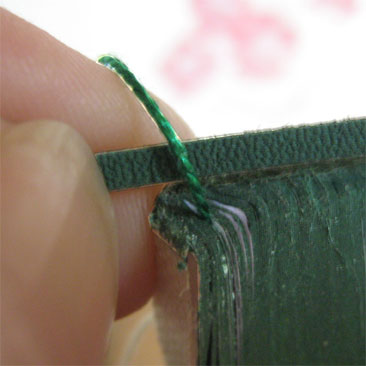
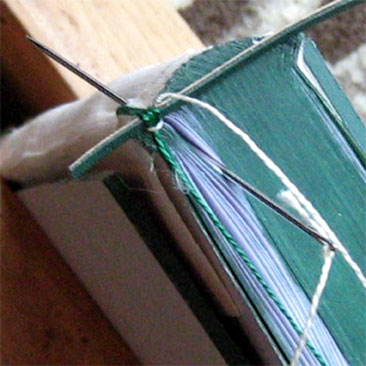
Make
a loop by bringing one thread over the top of the book
and pushing the needle through the same hole again. Pull
the thread gently through until a small loop is left,
Curve the leather strip a little and thread it into the
loop. Pull the thread until it fits neatly round the leather
strip. (Don't make it too tight or the leather will buckle.)
|
|
|
|
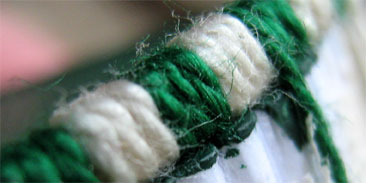
The
leather strip should rest on the very edge of the book,
creating a smooth extension to the spine. |
|
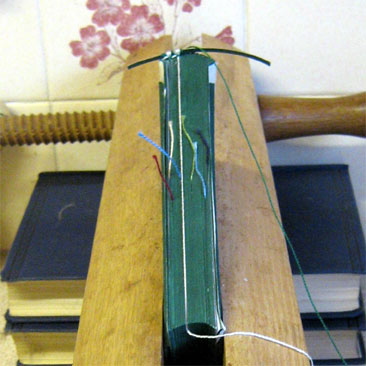
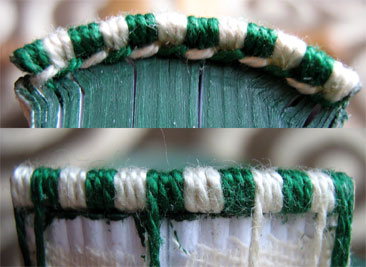
Bring
the thread over the leather strip twice more, so that
3 loops are formed round it. Leave the thread at the front
of the book. Take the second thread, bring it round and
underneath the left hand end of the leather strip, across
the 3 loops and back underneath the leather stip. This
forms a bead.
|
|
|
|
Bring
the second thread back over the leather strip to form
another loop. On either the first or second loop (whichever
is best positioned), push the needle through the centre
of the next marked section and spine, bring it out underneath
the first line of stitching. This anchors the headband.
After the anchor stitch has been made, continue until
3 loops have been made. Leave the thread at the front
of the book. Take the first thread and make a bead by
bringing it across the front of the 3 loops that have
just been made and underneath the leather strip, so that
it finishes hehind the leather slip. It is now in position
to make the next 3 loops.
|
|
Slot
the thread that isn’t being used gently between the
pages of the book. It should be taut, but not so tight
that it pulls the leather strip out of position. Continue
making sets of 3 loops and a bead with alternate colours,
inserting further anchor stitches at the markers. Anchor
stitches can only be made on either the first or second
loops. This is because the thread always has to finish
at the front of the work after the third loop, in order
to make the next bead.
|
|
|
|
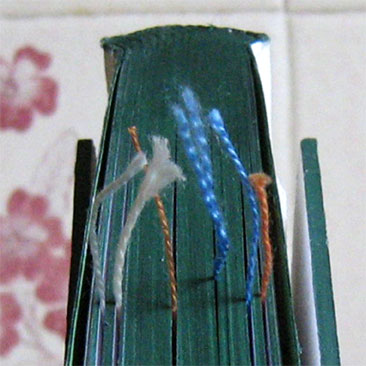
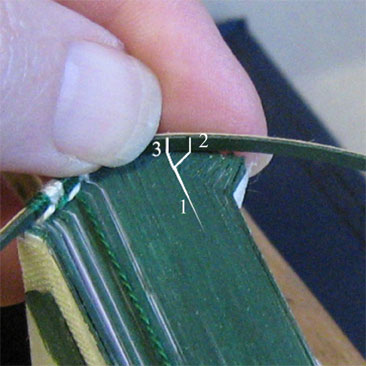
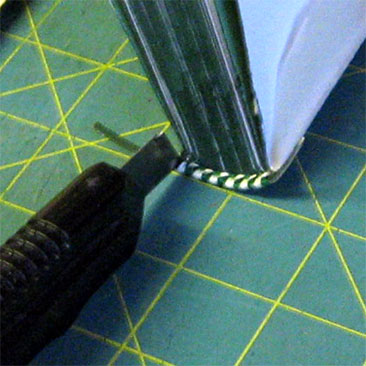
Be
careful positioning the anchor stitches. Check where the
very end of the section is. When a book has been rounded
and jointed, the sections can curve significantly. In
the picture,1 is the centre of a section. At first glance,
it is easy to assume that it will finish at 3. In fact,
it finishes at 2 and this is where the thread will lie.
The anchor stitch should not therefore be made until the
headband has reached point 2.
|
|
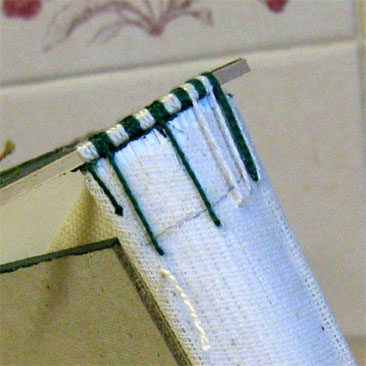
When
the final marker at the end of the spine is reached, make
the final anchor stitch on the third loop of the last
group. Cut the thread leaving approximately half an inch
at the back of the spine. Make the final bead, cut the
thread and fasten both ends to the back of the spine with
a dab of PVA.
|
|
|
|
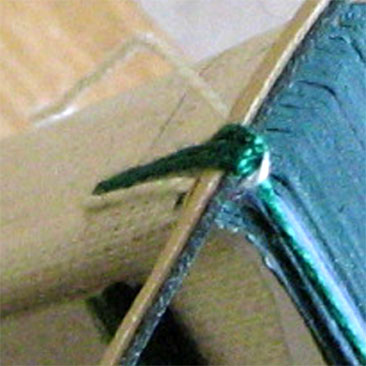
Trim
the excess off both ends of the leather strip with a
sharp knife. Dab a little PVA onto either end.
|
|
The
finished headband should always be slightly shorter than
the width of the spine. This is to ensure a neat finish
when the headcaps are made or when the book is cased in.
|
 |
|
|