|

|
There's now a Bookbinding Message
Board HERE
|
|
Rebinding a Paperback Book
|
|
|
|
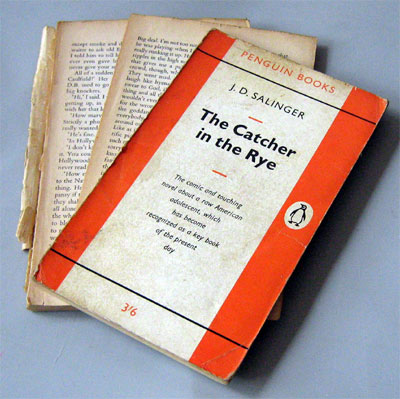
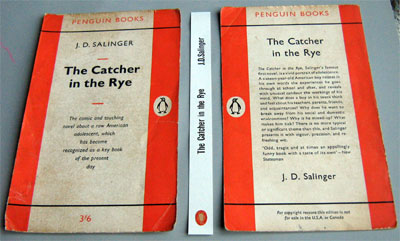
Bookbinding isn't just confined to hardbacks. While it isn't usually cost effective to rebind a paperback, the monetary value of a book isn't everything and sometimes there are other reasons to make it worth while. This copy of "The Catcher in the Rye" by J D Salinger was given to me one Christmas. At the time I was a couple of years younger than Holden Caulfield, the main character. I've lost count of how many times I read it over the next few years because as I grew older myself, I saw the book through new eyes each time I went back to it. As a result, it's become extremely well worn. Of course I could go out and buy a new copy, but it just wouldn't have the same memories. Instead, I've decided to give my old copy a facelift.
|
|
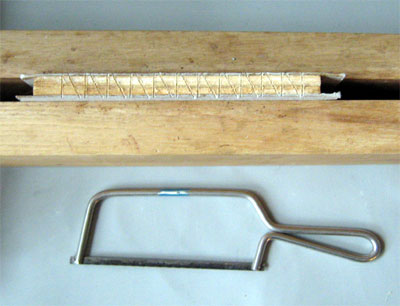
Unlike a hardback, which is made from a series of sections which are sewn together, a paperback consists of single pages glued together along the spine. Inevitably this makes the finished book a lot weaker and more prone to splitting or developing loose pages if it is well used. The first step is to clean off the spine, remove as much of the old glue as possible and then strengthen the textblock. To strengthen the text block, the book is put into a press and saw cuts are made along the length of the spine. |
|
|
|
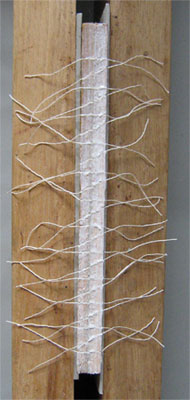
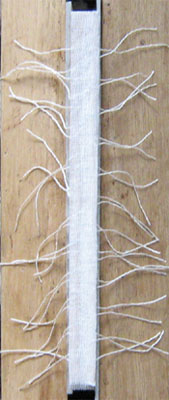
A layer of PVA is put onto the spine and then thread is sunk into each of the sawcuts. As an extra reinforcement a layer of scrim (sometimes called mull) is added. So the spine is now being held together not just with glue, but with the thread and scrim as well. The book is then left for a few days so that the PVA is completely hard and dry. The finished result will still never be as strong as a book with sewn sections, but it will be much sturdier than it was before. |
|
Once the glue is completely dry, the excess thread is trimmed off. The end result is barely visible, but has made a considerable difference to the strength of the book.
|
|
 |
Endpapers are tipped with paste onto either end of the book and trimmed. Machine made headbands are glued to either end of the spine. Because it is made from loose sheets of paper rather than sewn sections, a paperback cannot be rounded and jointed. Nor can it be given handsewn headbands, so the next step is to make the case. The procedure for this is exactly the same as I've already shown on the Cloth Binding page, so there is little point in repeating it here. The picture on the left shows the text block cased in. By a lucky chance, I had some cloth here which is similar in colour to the orange of the original paperback cover.
|
|
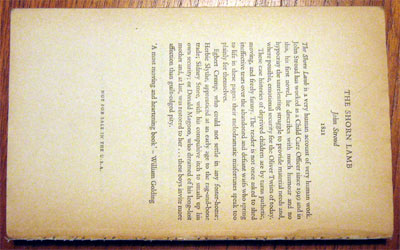
I'd like to keep as much of the original book as possible. I've trimmed the ragged edges of the old cover. The original spine was beyond repair, although I did manage to salvage the "penguin" logo, so I've made a new label to run down the length of the spine. |
|
 |
The original covers have been glued onto the new case and the book is finished. I've still got my old book with its familiar orange cover, but I no longer have to worry about it falling apart any when I read it. |
|
|
|
|
The
Catcher in the Rye by J. D. Salinger was rebound between 3rd July
and 8th July 2007
|
|
|
A
wealth of information about craft bookbinding can be found at
www.aboutbookbinding.com
|
Copyright © Ann Dickinson 2007